Making slides
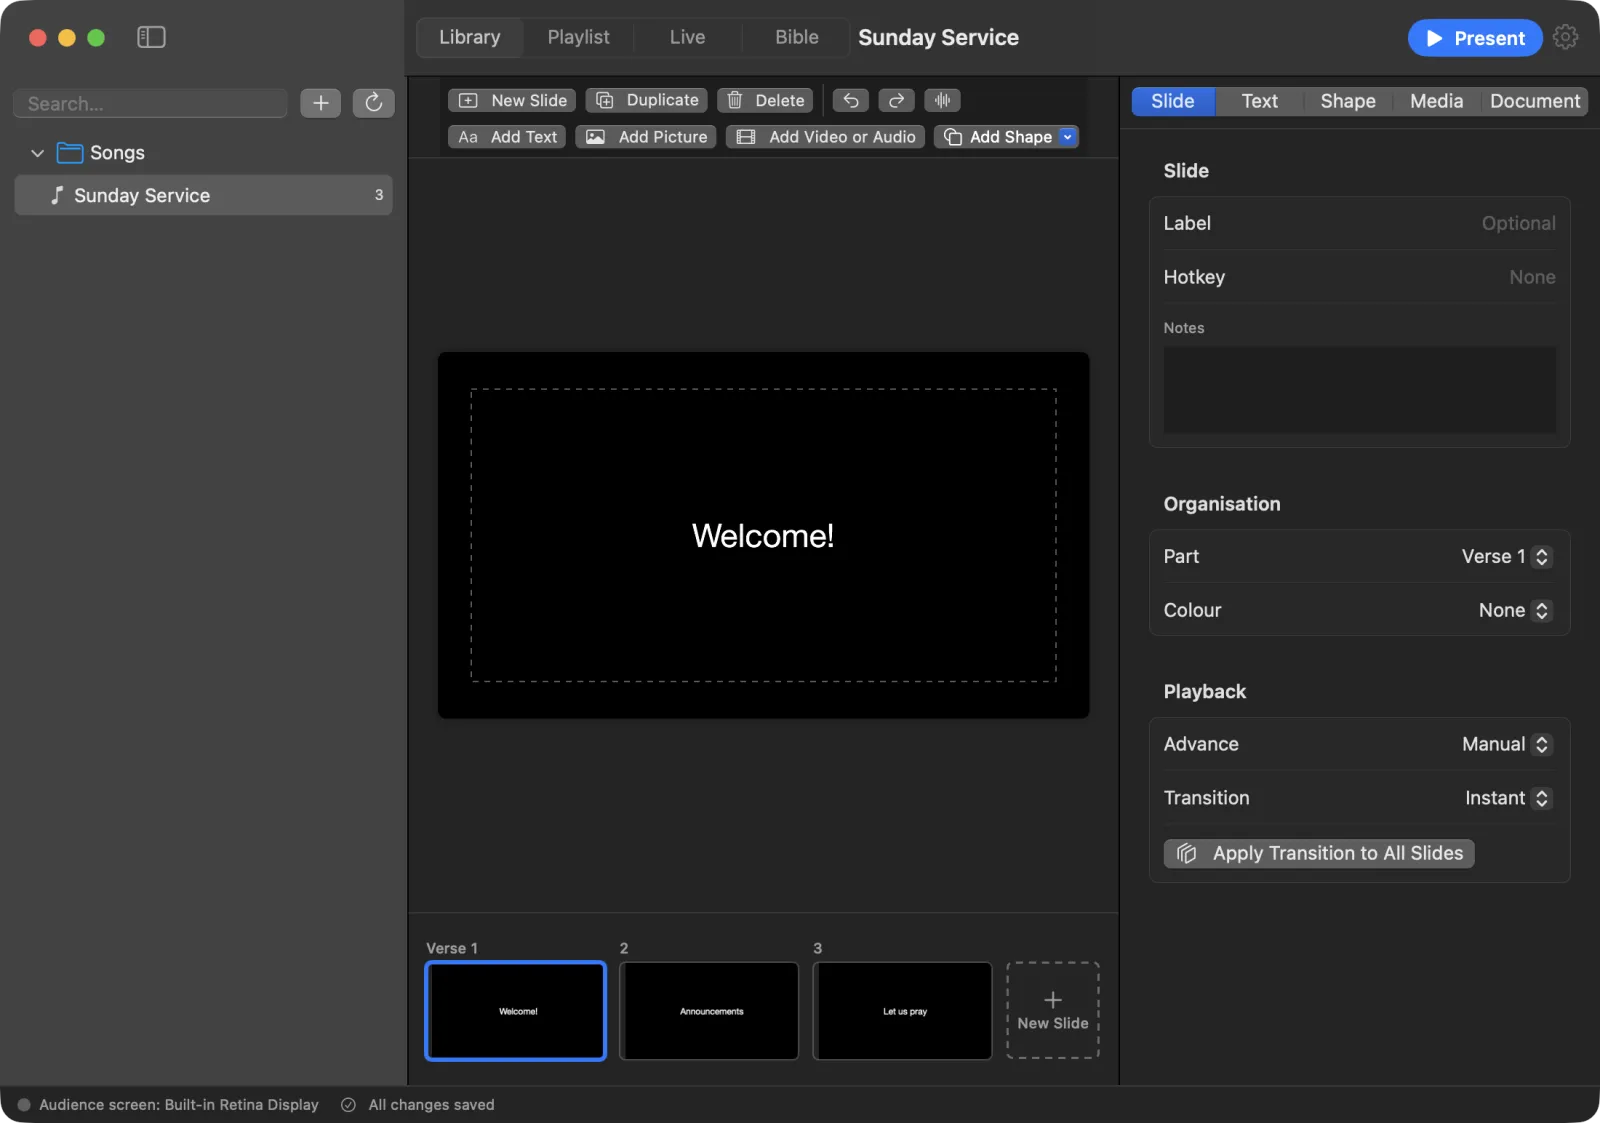
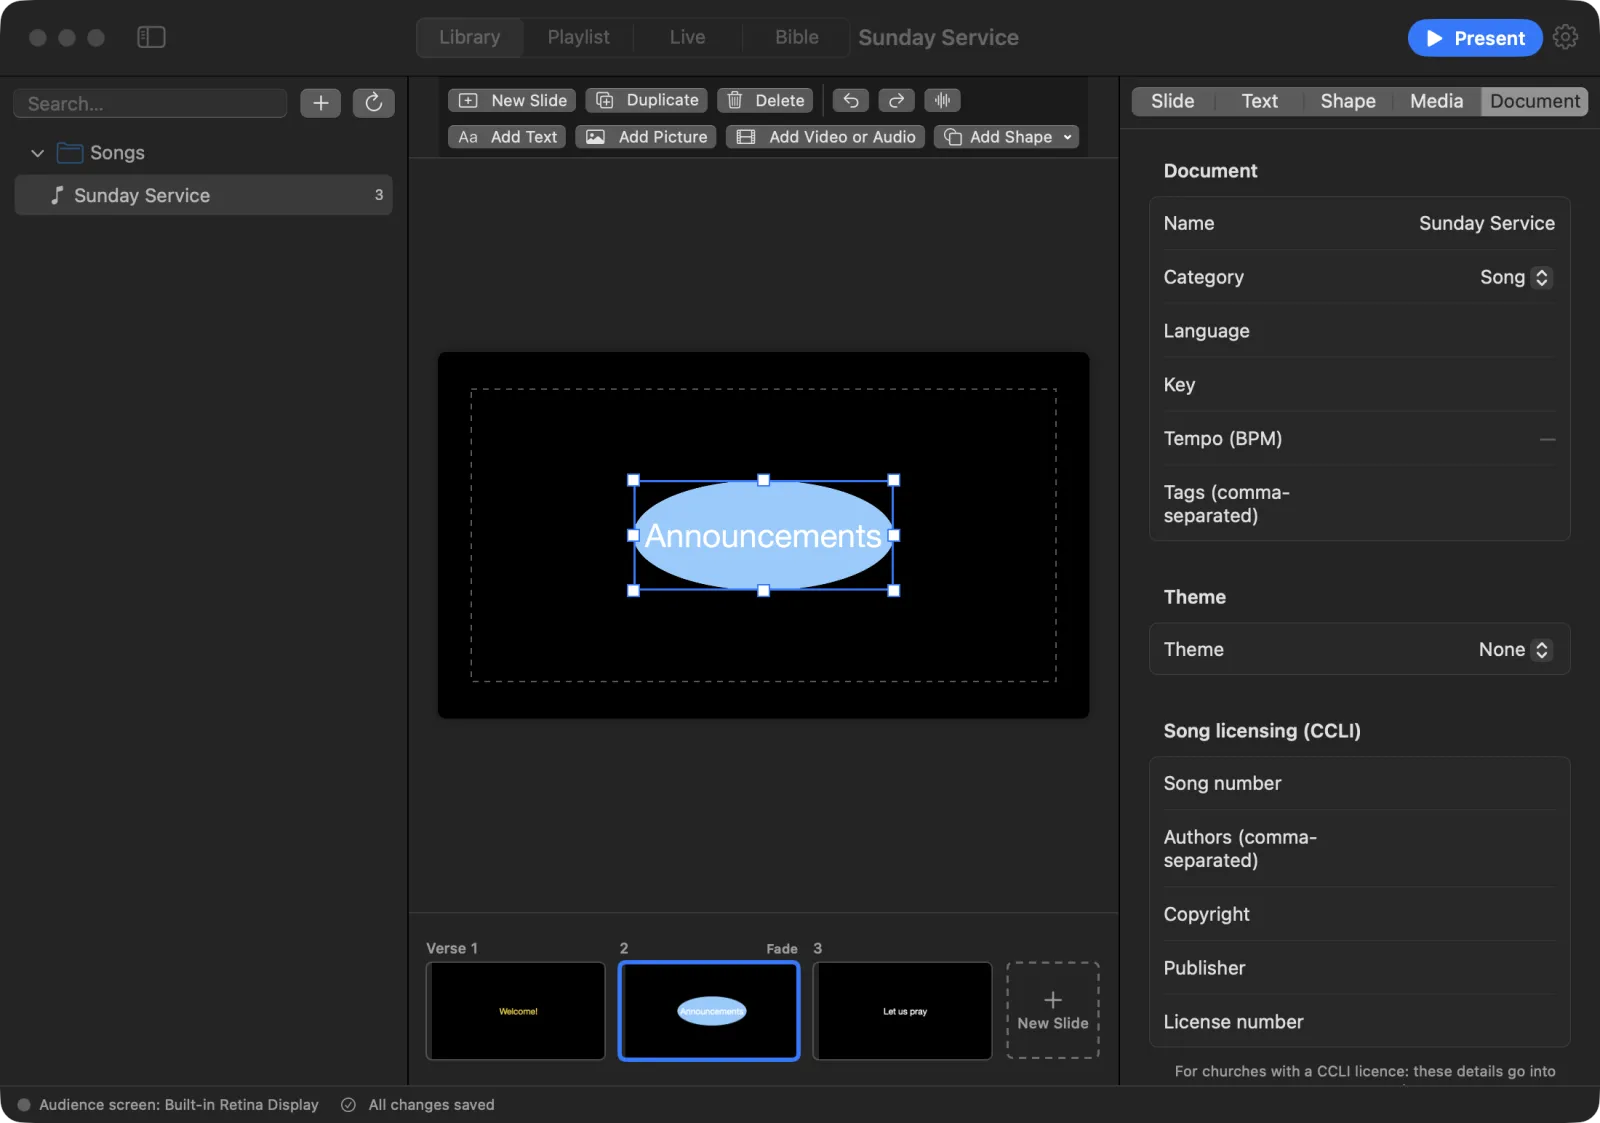
This page shows you how to build a presentation slide by slide. You do all of this on the Library screen: the slide is in the middle, the slide list runs along the bottom, and the inspector with its five tabs is on the right.
Add, duplicate and delete slides
The bar above the slide has the main buttons.
- New Slide (⌘↩) adds a slide after the selected one. You can also click the New Slide tile at the end of the slide list.
- Duplicate (⌘D) copies the selected slides.
- Delete (⌘⌫) removes the selected slides. A message says “Slide deleted — ⌘Z brings it back”.
To select several slides, hold Command and click each one.
Type on a slide
- Double-click the text box on the slide. You can also click it once and press Return.
- Type your words. Press Return for a new line.
- Click outside the box when you are done.
Change the order of slides
- Drag a slide in the slide list to a new place.
- Or right-click a slide and choose Move Left or Move Right.
- Or use Document › Move Slide Left (⌘[) and Document › Move Slide Right (⌘]).
The right-click menu also has Duplicate, Delete, Colour (a colour tag) and Part (for songs).
Undo and redo
Made a mistake? Press Undo in the bar (⌘Z). Press Redo (⇧⌘Z) to put the change back.
The inspector tabs
The inspector on the right has five tabs:
- Slide — this slide: label, hotkey, notes, part, colour, timing and transition.
- Text — the font, size, colour and position of the selected text.
- Shape — the fill, outline and position of the selected shape.
- Media — the selected picture, video or sound.
- Document — the whole presentation: name, theme and song details.
Format text
- Click the text box once to select it.
- Open the Text tab.
- Change what you need:
- Font: Family, Weight (from Thin to Black), Size, Italic and Underline. Theme Default follows the presentation’s theme.
- Colour: click a swatch (White, Yellow, Black, Light blue, Red) or the colour well for any colour.
- Layout: Alignment (Left, Centre, Right, Justified), Vertical (Top, Middle, Bottom), Autofit, Line spacing and Hyphenation.
- Effects: Drop shadow, Outline and Background plate (a dark band that keeps words readable over pictures).
With Autofit set to Shrink to Fit, long text gets smaller so it always fits its box. Press ⌘B for bold.
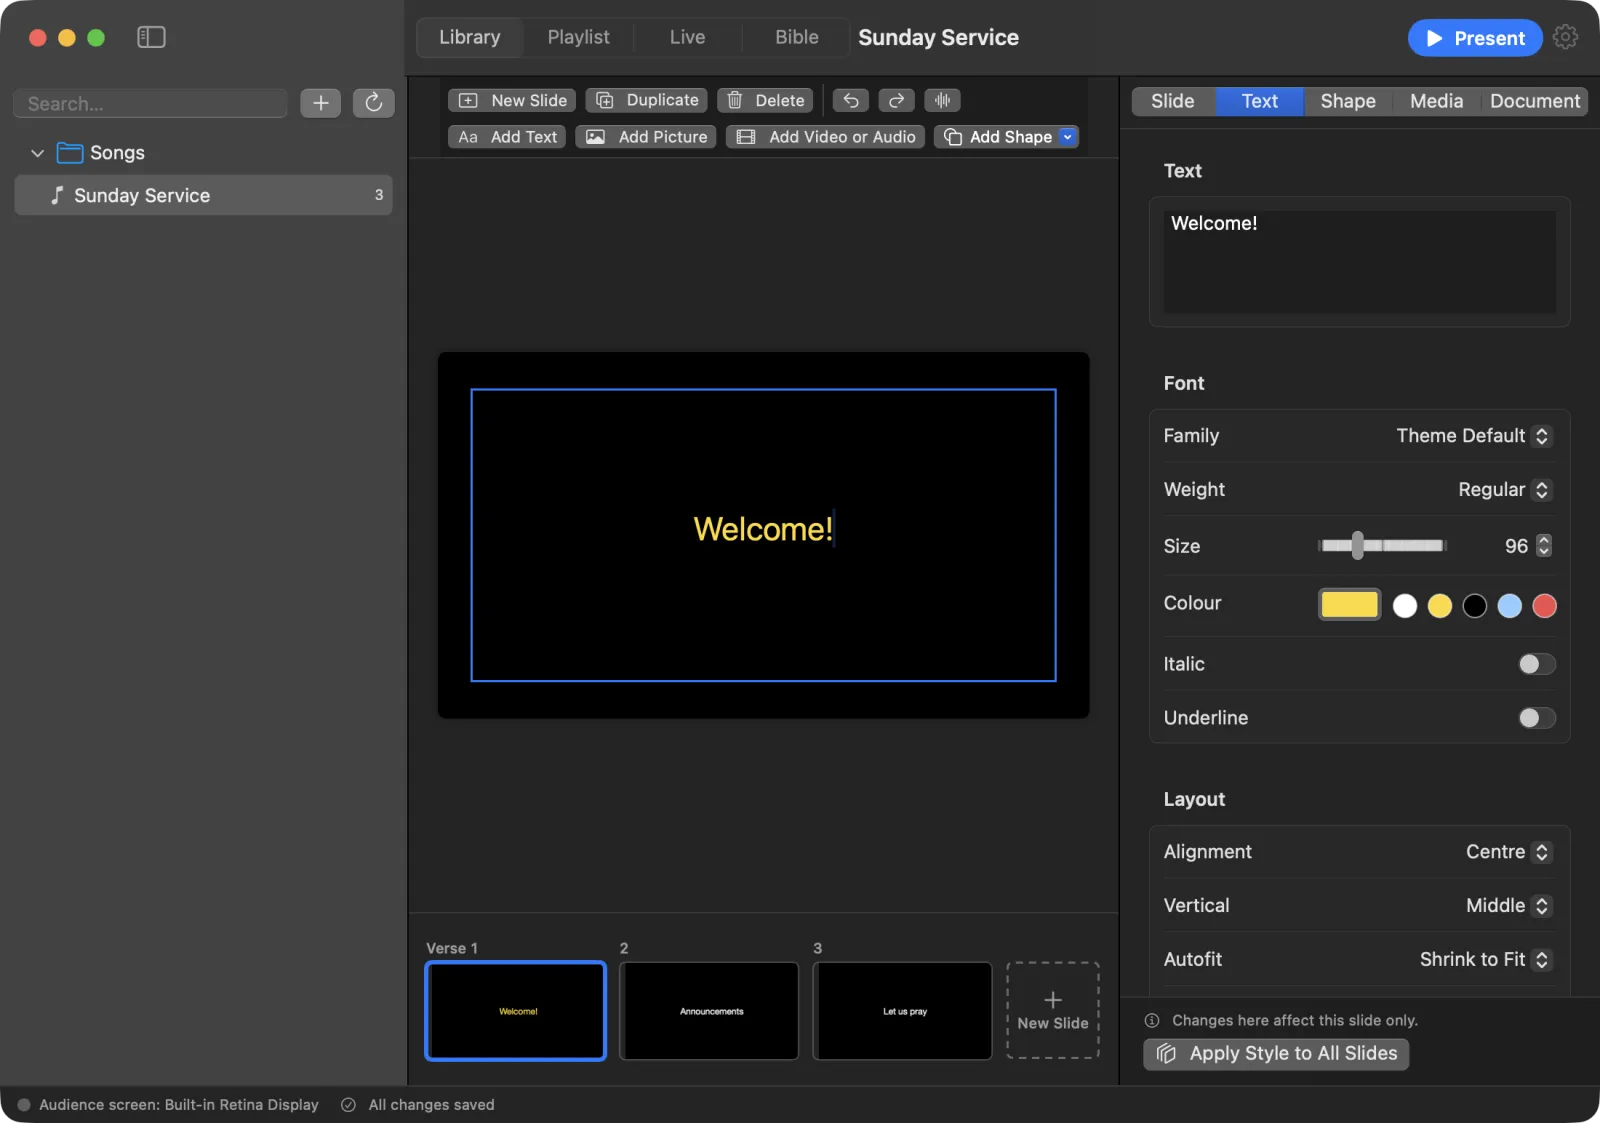
Tip: Changes on the Text tab affect this slide only. To give every slide the same look, press Apply Style to All Slides. See Songs and lyrics.
Add shapes, pictures, video and sound
Use the buttons above the slide, or the Insert menu:
- Add Text (Insert › Text Box, ⇧⌘T) adds a text box.
- Add Picture (Insert › Picture…, ⇧⌘P) adds a picture from a file, such as JPEG, PNG or HEIC.
- Add Video or Audio (Insert › Video or Audio…, ⇧⌘M) adds a video background or a sound.
- Add Shape (Insert › Shape) adds a Rectangle, Ellipse, Line or Triangle.
Drag an item to move it. Drag a corner to resize it. Right-click it for Bring to Front, Send to Back, Duplicate and Delete. The Arrange menu has the same layer commands.
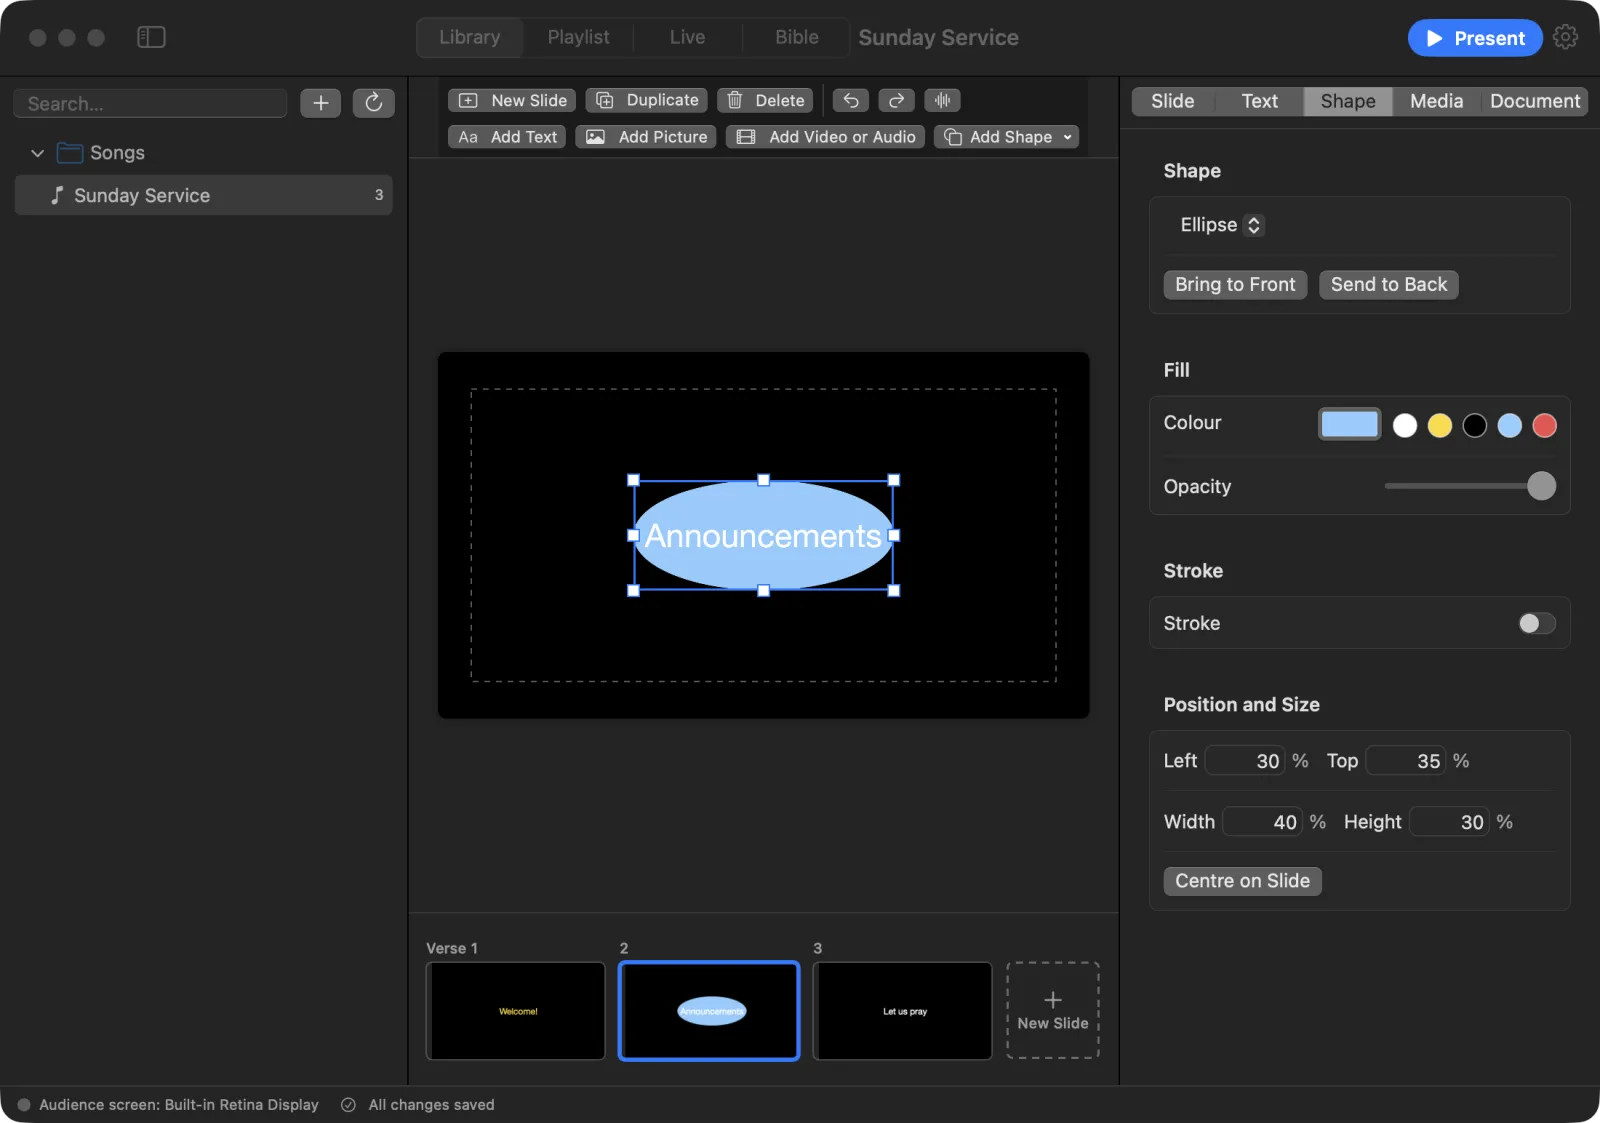
To change a shape, select it and open the Shape tab. There you can pick a different Shape, a fill Colour, an outline (Stroke, its Colour and Width), Corner radius, Opacity and an exact Position and Size. Centre on Slide puts it in the middle.
For a picture or video, open the Media tab. Choose how it fits its box with Aspect (for example Fit (show all) or Fill (crop edges)), and for video choose Loop, Volume, Fade in (s) and Fade out (s).
Transitions and timing
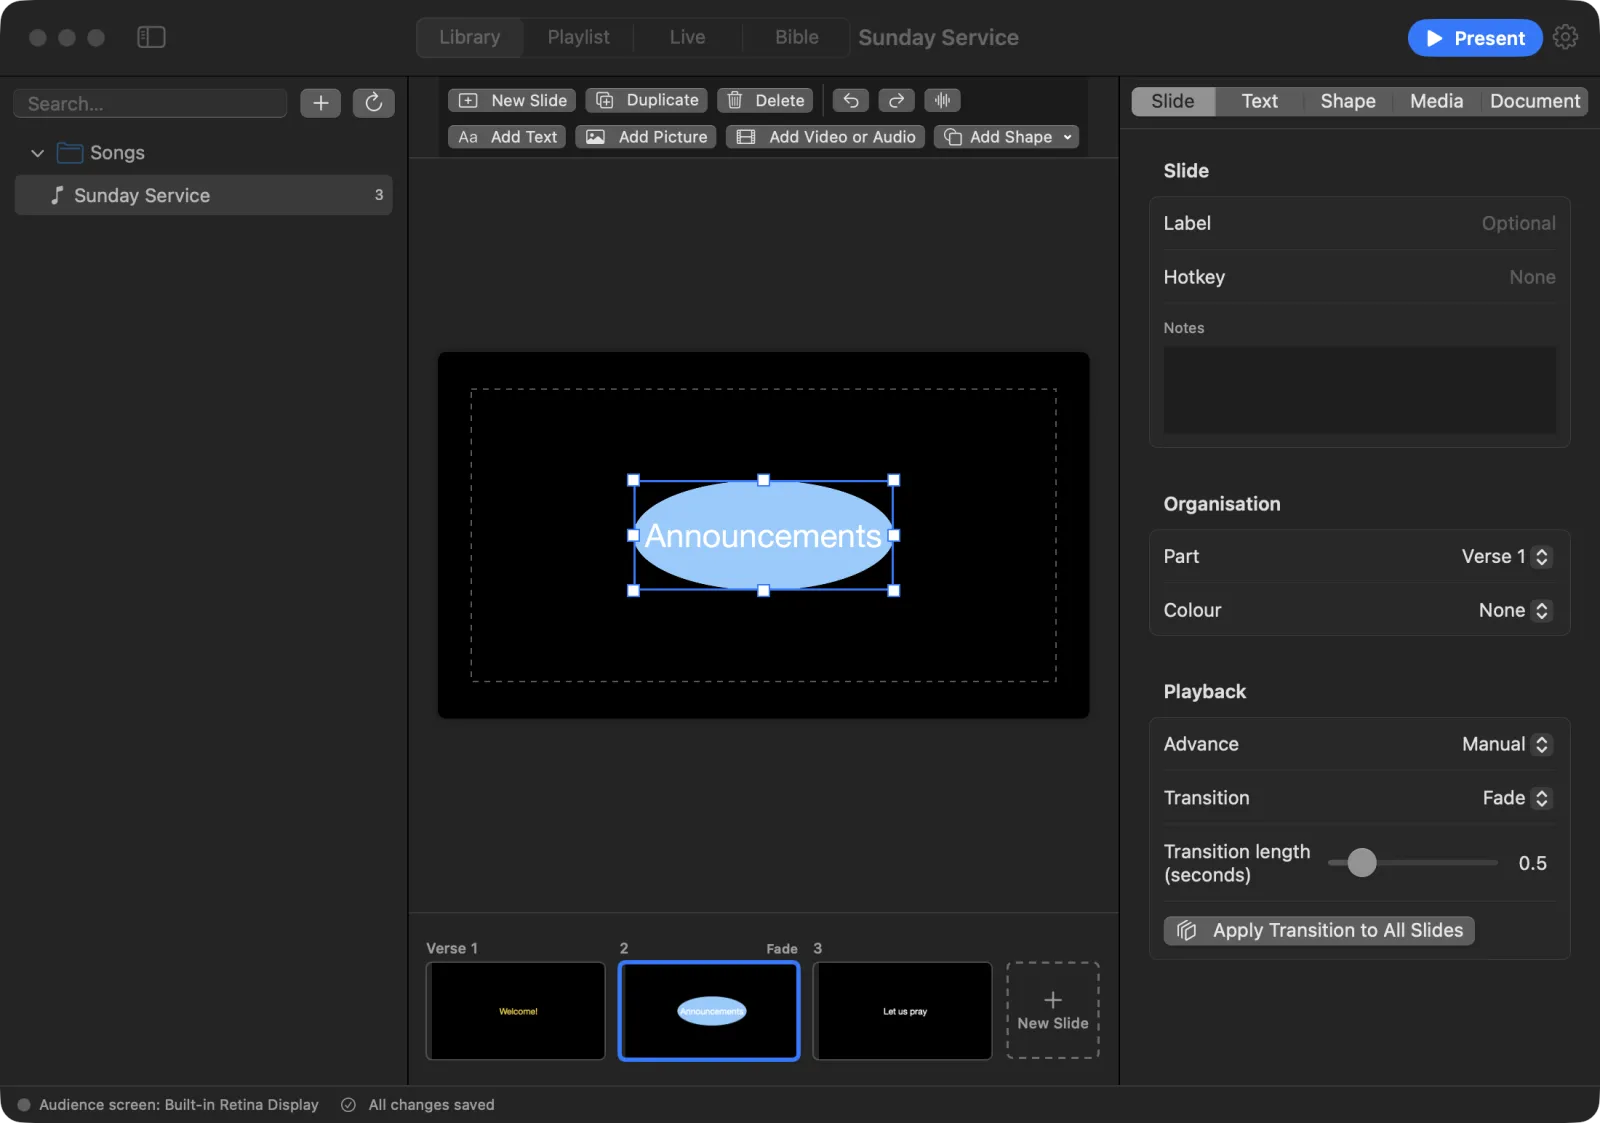
Select a slide and open the Slide tab.
To set a transition:
- Under Transition, pick Instant, Fade (goes through black), Cross Fade (blends straight in) or Slide (pushes the new slide in).
- Drag Transition length (seconds) to make it faster or slower.
- To use the same transition for every slide, press Apply Transition to All Slides.
To make a slide move on by itself, set Advance to Timed and enter the seconds in Move on after (seconds). On media end moves on when the video ends. Manual waits for you.
The Slide tab also has a Label (a short name shown under the slide), a Hotkey (a key that jumps to this slide during the show) and Notes (for the presenter only; the audience never sees them).
The Document tab
Open the Document tab to set things for the whole presentation:
- Name — the name shown in the library.
- Category — Song, Sermon, Announcement, Prayer, Video or Generic. The library groups presentations by category.
- Theme — fonts, colours and background for every slide.
- Language, Key, Tempo (BPM) and Tags (comma-separated) — extra details. Tags help you find the presentation in library search.
You can also use Document › Apply Theme, or Document › Apply Template for a ready-made slide layout.